Configure Postfix on Ubuntu 16.04 as SMTP

If the postfix has been installed, then run the following command to reconfigure

sudo dpkg-reconfigure postfix

Answer the question as the following:

  • General type of mail configuration: Internet Site
  • System mail name: test.com Can be any domain, even a fake one.
  • Root and postmaster mail recipient: ubuntu the login user in ubuntu system that you have created
  • Other destinations to accept mail for (blank for none): $myhostname, test.com, localhost.localdomain, , localhost
  • Force synchronous updates on mail queue? No
  • Local networks: 127.0.0.0/8 [::ffff:127.0.0.0]/104 [::1]/128
  • Use procmail for local delivery? Yes
  • Mailbox size limit (bytes): 0
  • Local address extension character: +
  • Internet protocols to use: all

Edit the postfix config file to point to virtual file:
vi /etc/postfix/main.cf
Set this value
virtual_alias_maps = hash:/etc/postfix/virtual

Edit the virtual addresses with the following command:

sudo vi /etc/postfix/virtual

Add the following entries:

contact@test.com ubuntu
admin@test.com ubuntu

Then run the following command:
postmap /etc/postfix/virtual

Lastly restart postfix.

To debug and find out what happen when you send mail with this command
echo "Test mail" | mail -s "Test" ltest@yahoo.com

tail -f /var/log/mail.log
tail -f /var/log/mail.err

Set root password for mysql on Ubuntu LTS 16.04.3

After a manual installation of mysql using apt-get install (instead of install it during ubuntu installation), to set the root password for mysql on Ubuntu LTS 16.04.3, follow the steps below:

sudo mysql 

mysql> ALTER USER 'root'@'localhost' IDENTIFIED WITH mysql_native_password BY 'hard to guess password'; 
Query OK, 0 rows affected (0.01 sec) 

mysql> flush privileges; 
Query OK, 0 rows affected (0.01 sec) 

mysql> exit 
Bye

Please replace ‘hard to guess password’ with your own password.


AppCompat v7 (21.+) Navigation Drawer for Pre-Lollipop

This is the sequel to my previous post here where I create a new android app with a App Compat v7 (21.+) for pre-lollipop device. Now I am adding Navigation Drawer into the app.

Just a side note, Android Studio 1.0 has just been released 9 hours ago (as I’m typing this line at 12:07pm GMT+8). My Android Studio has been updated.

Let’s start

  1. Create the layout to be used as content of navigation panel app/src/main/res/layout/nav_drawer.xml.

    <?xml version="1.0" encoding="utf-8"?>
    <!-- android:layout_gravity="start" tells DrawerLayout to treat
         this as a sliding drawer on the left side for left-to-right
         languages and on the right side for right-to-left languages.
         The drawer is given a fixed width in dp and extends the full height of
         the container. A solid background is used for contrast
         with the content view. -->
    <ScrollView xmlns:android="http://schemas.android.com/apk/res/android"
        android:id="@+id/scrollView"
        android:layout_width="260dp"
        android:layout_height="match_parent"
        android:background="@color/button_material_light"
        android:layout_gravity="start">
    
        <RelativeLayout
            android:layout_width="match_parent"
            android:layout_height="match_parent"
            android:orientation="vertical">
    
            <FrameLayout
                android:id="@+id/nav_top"
                android:layout_width="match_parent"
                android:layout_height="100dp"
            >
    
            </FrameLayout>
    
            <ListView
                android:id="@+id/nav_list"
                android:layout_width="match_parent"
                android:layout_height="match_parent"
                android:layout_below="@+id/nav_top" />
        </RelativeLayout>
    </ScrollView>
    
  2. Add the DrawerLayout into the main activity layout file /app/src/main/res/layout/activity_main.xml and also include the nav_drawer.xml into the main layout by adding the following lines (highlighted)
    <RelativeLayout xmlns:android="http://schemas.android.com/apk/res/android"
        xmlns:tools="http://schemas.android.com/tools"
        android:layout_width="match_parent"
        android:layout_height="match_parent"
        tools:context=".MainActivity">
    
        <include
            android:id="@+id/app_bar"
            layout="@layout/appbar" />
    
        <android.support.v4.widget.DrawerLayout
            android:id="@+id/drawer_layout"
            android:layout_width="match_parent"
            android:layout_height="match_parent"
            android:layout_below="@id/app_bar"
            >
    
            <TextView
                android:layout_width="wrap_content"
                android:layout_height="wrap_content"
                android:text="@string/hello_world" />
    
            <include layout="@layout/nav_drawer" />
    
        </android.support.v4.widget.DrawerLayout>
    
    </RelativeLayout>
    

    notice that android:layout_below="@id/app_bar" has been removed from the TextView element and added as DrawerLayout‘s attribute.

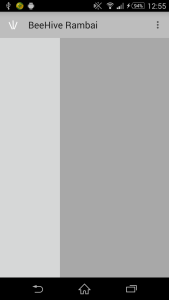
    Up till this step, this is produced
    Rambai Navigation Bar

  3. Now let’s begin add the home icon (burger). Edit app/src/main/res/values/styles.xml
    <resources>
    
        <!-- Base application theme. -->
        <style name="AppTheme" parent="Theme.AppCompat.Light">
            <!-- to remove the default action -->
            <item name="android:windowNoTitle">true</item>
            <item name="windowActionBar">false</item> <!-- For 2.x version -->
            
            <item name="drawerArrowStyle">@style/DrawerArrowStyle</item>
        </style>
    
        <style name="DrawerArrowStyle" parent="Widget.AppCompat.DrawerArrowToggle">
            <item name="spinBars">true</item>
            <item name="color">@android:color/white</item>
        </style>
    
    </resources>
    
  4. Last step. Edit the activity java file.
    import android.content.res.Configuration;
    import android.support.v4.widget.DrawerLayout;
    import android.support.v7.app.ActionBarActivity;
    import android.os.Bundle;
    import android.support.v7.app.ActionBarDrawerToggle;
    import android.support.v7.widget.Toolbar;
    import android.view.Menu;
    import android.view.MenuItem;
    import android.view.View;
    
    public class MainActivity extends ActionBarActivity {
        private DrawerLayout mDrawerLayout;
        private ActionBarDrawerToggle mDrawerToggle;
    
        private CharSequence mDrawerTitle;
        private CharSequence mTitle;
    
        @Override
        protected void onCreate(Bundle savedInstanceState) {
            super.onCreate(savedInstanceState);
            setContentView(R.layout.activity_main);
    
            final Toolbar toolbar = (Toolbar) findViewById(R.id.app_bar);
            setSupportActionBar(toolbar);
    
            getSupportActionBar().setDisplayHomeAsUpEnabled(true);
    
            mTitle = getTitle();
            mDrawerTitle = "Navigation Drawer";
    
            mDrawerLayout = (DrawerLayout) findViewById(R.id.drawer_layout);
            mDrawerToggle = new ActionBarDrawerToggle(
                    this,
                    mDrawerLayout,
                    toolbar,
                    R.string.drawer_open,
                    R.string.drawer_close)
            {
                public void onDrawerClosed(View view) {
                    super.onDrawerClosed(view);
                    toolbar.setTitle(mTitle);
                    invalidateOptionsMenu();
                    syncState();
                }
    
                public void onDrawerOpened(View drawerView) {
                    super.onDrawerOpened(drawerView);
                    toolbar.setTitle(mDrawerTitle);
                    invalidateOptionsMenu();
                    syncState();
                }
            };
    
            mDrawerLayout.setDrawerListener(mDrawerToggle);
    
        }
    
        @Override
        protected void onPostCreate(Bundle savedInstanceState) {
            super.onPostCreate(savedInstanceState);
            // This to ensure the navigation icon is displayed as
            // burger instead of arrow.
            // Call syncState() from your Activity's onPostCreate
            // to synchronize the indicator with the state of the
            // linked DrawerLayout after onRestoreInstanceState
            // has occurred.
            mDrawerToggle.syncState();
        }
    
        @Override
        public void onConfigurationChanged(Configuration newConfig) {
            super.onConfigurationChanged(newConfig);
            // This method should always be called by your Activity's 
            // onConfigurationChanged method.
            mDrawerToggle.onConfigurationChanged(newConfig);
        }
    
    
        @Override
        public boolean onCreateOptionsMenu(Menu menu) {
            // Inflate the menu; this adds items to the action bar if it is present.
            getMenuInflater().inflate(R.menu.menu_main, menu);
            return true;
        }
    
        @Override
        public boolean onOptionsItemSelected(MenuItem item) {
            // Pass the event to ActionBarDrawerToggle, if it returns
            // true, then it has handled the app icon touch event
            // This handle among other things open & close the drawer
            // when the navigation icon(burger/arrow) is clicked on.
            if (mDrawerToggle.onOptionsItemSelected(item)) {
                return true;
            }
    
            // Handle other action bar items...
            switch (item.getItemId()) {
                case R.id.action_settings:
                    return true;
            }
    
            return super.onOptionsItemSelected(item);
        }
    }
    
  5. Here’s the result…

    step-02.0
    step-02.1
    step-02.2
    step-02.3
    step-02.4
    Potrait layout with the transition when opening the drawer.

    step-03.0
    step-03.1

    step-03.2
    step-03.3
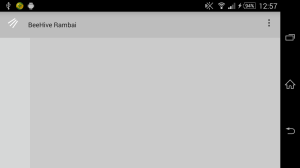
    Landscape layout with the transition when closing the drawer.

References

AppCompat v7 (21.+) Toolbar for Pre-Lollipop

Short note for self reference on how to use the AppCompat v21 Toolbar for Pre-Lollipop android application with the following starting point:

  • create a new Android Project from the Android Studio (1.0 RC 4)
  • choose Blank Activity

Let’s start

  1. Disable the default ActionBarEdit app/src/main/res/values/styles.xml by adding the following lines (highlighted)
    <resources>
        <!-- Base application theme. -->
        <style name="AppTheme" parent="Theme.AppCompat.Light">
            <!-- to remove the default action -->
            <item name="android:windowNoTitle">true</item>
            <item name="windowActionBar">false</item> <!-- For 2.x version -->
    
        </style>
    </resources>
    
  2. Add app/src/main/res/layout/appbar.xml file
    <?xml version="1.0" encoding="utf-8"?>
    <android.support.v7.widget.Toolbar xmlns:android="http://schemas.android.com/apk/res/android"
        android:layout_width="match_parent"
        android:layout_height="wrap_content"
        android:background="?attr/colorPrimary">
    </android.support.v7.widget.Toolbar>
    
  3. Remember to remove the hightlighted lines in the app/src/main/res/layout/activity_main.xml
    <RelativeLayout xmlns:android="http://schemas.android.com/apk/res/android"
        xmlns:tools="http://schemas.android.com/tools"
        android:layout_width="match_parent"
        android:layout_height="match_parent"
        android:paddingBottom="@dimen/activity_vertical_margin"
        android:paddingLeft="@dimen/activity_horizontal_margin"
        android:paddingRight="@dimen/activity_horizontal_margin"
        android:paddingTop="@dimen/activity_vertical_margin"
        tools:context=".MainActivity">
    

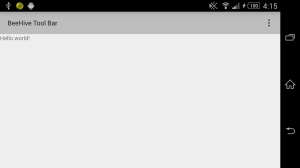
    or else your will see the padding like this

  4. Now includes the appbar.xml into layout file app/src/main/res/layout/activity_main.xml
    <RelativeLayout xmlns:android="http://schemas.android.com/apk/res/android"
        xmlns:tools="http://schemas.android.com/tools"
        android:layout_width="match_parent"
        android:layout_height="match_parent"
        tools:context=".MainActivity">
    
        <include
            android:id="@+id/app_bar"
            layout="@layout/appbar"/>
    
        <TextView
            android:layout_below="@id/app_bar"
            android:layout_width="wrap_content"
            android:layout_height="wrap_content"
            android:text="@string/hello_world" />
    
    </RelativeLayout>
    
  5. Set the newly added toolbar to act as your ActionBar by adding the highlighted lines into MainActivity class
    public class MainActivity extends ActionBarActivity {
    
        @Override
        protected void onCreate(Bundle savedInstanceState) {
            super.onCreate(savedInstanceState);
            setContentView(R.layout.activity_main);
    
            Toolbar toolbar = (Toolbar) findViewById(R.id.app_bar);
            setSupportActionBar(toolbar);
    
        }
    

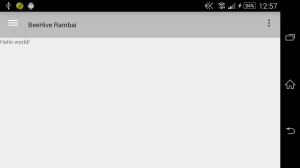
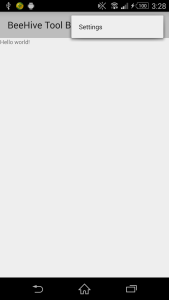
The final result…

after
after-menu
after-landscape

I just noticed the font in the toolbar title in landscape mode look smaller than the potrait mode. In fact, I did a check by running Google Play and this seems to be the default styling for google.

References

Updated on 20th Feb 2015:
– fixed the missing highlight in Step 4 according to comment by Polmabri

Remote unlocking LUKS encrypted LVM using Dropbear SSH in Ubuntu Server 14.04.1 (with Static IP)

There are many posts on how to do this, but so far I have not found any which clearly stated steps to configure this with initramfs static IP and overcome issue arises from setting the initramfs with static IP. Apart from the static IP, I want to revert back to OpenSSH after the LUKS has been unlock.

This has been tested to work on fresh Ubuntu Server 14.04.1 install, with disk encryption with LVM and OpenSsh installed during the OS installation.

  1. Install dropbear
    sudo apt-get install dropbear
    
  2. Configure dropbear to autostart at boot (during initramfs)
    sudo vi /etc/default/dropbear
    

    change NO_START=1 to NO_START=0

  3. Copy the ssh keys. Note: Password logins for root is disabled by default dropbear configuration.

    sudo cp /etc/initramfs-tools/root/.ssh/id_rsa ~/id_rsa_dropbear
    sudo chown parkia:parkia ~/id_rsa_dropbear
    

    Replace the parkia with your username.

    Copy the id_rsa_dropbear into your remote server. In your remote server, you can configure your ssh client with shortcut by editing the ~/.ssh/config

    Host parkia
            Hostname 192.168.11.111
            User root
            UserKnownHostsFile ~/.ssh/know_hosts.initramfs
            IdentityFile ~/.ssh/id_rsa_dropbear
    

    The step above is only for illustrative purpose and convenience sake only (so that I don’t have to go through the whole ssh key generation steps :-p here).

    For real world setup, you should already generated your personal key. With that, just append your public key to the dropbear’s /etc/initramfs-tools/root/.ssh/authorized_keys
    file

    cat id_rsa.pub >> /etc/initramfs-tools/root/.ssh/authorized_keys
    

    See the link in the references at the bottom of this post if you want to learn more about the ssh public/private keys.

  4. To allow the remote root user to unlock the LUKS encrypted LVM, create the initramfs hook
    sudo vi /etc/initramfs-tools/hooks/crypt_unlock.sh
    

    paste this into the file

    #!/bin/sh
    
    PREREQ="dropbear"
    
    prereqs() {
    echo "$PREREQ"
    }
    
    case "$1" in
    prereqs)
    prereqs
    exit 0
    ;;
    esac
    
    . "${CONFDIR}/initramfs.conf"
    . /usr/share/initramfs-tools/hook-functions
    
    if [ "${DROPBEAR}" != "n" ] && [ -r "/etc/crypttab" ] ; then
    cat > "${DESTDIR}/bin/unlock" << EOF
    #!/bin/sh
    if PATH=/lib/unlock:/bin:/sbin /scripts/local-top/cryptroot; then
    kill \`ps | grep cryptroot | grep -v "grep" | awk '{print \$1}'\`
    # following line kill the remote shell right after the passphrase has
    # been entered.
    kill -9 \`ps | grep "\-sh" | grep -v "grep" | awk '{print \$1}'\`
    exit 0
    fi
    exit 1
    EOF
    
    chmod 755 "${DESTDIR}/bin/unlock"
    
    mkdir -p "${DESTDIR}/lib/unlock"
    cat > "${DESTDIR}/lib/unlock/plymouth" << EOF
    #!/bin/sh
    [ "\$1" == "--ping" ] && exit 1
    /bin/plymouth "\$@"
    EOF
    
    chmod 755 "${DESTDIR}/lib/unlock/plymouth"
    
    echo To unlock root-partition run "unlock" >> ${DESTDIR}/etc/motd
    
    fi
    

    save this file and make it executable.

    sudo chmod +x /etc/initramfs-tools/hooks/crypt_unlock.sh
    

    Note that I have added the following lines into the file

    # following line kill the remote shell right after the passphrase has
    # been entered.
    kill -9 \`ps | grep "\-sh" | grep -v "grep" | awk '{print \$1}'\`
    

    This line kill the remote shell right after the encrypted passphrase has been entered. If this line commented out, the remote shell will be left lingering there until the user enter exit. The lingering remote shell will also leave dropbear process running in the server after the boot is completed. Since OpenSSH is gonna run after the initramfs, while the lingering dropbear doesn’t cause any issue, I just don’t want it to remain.

  5. Set static IP for initramfs

    sudo vi /etc/initramfs-tools/initramfs.conf
    

    add the static IP under the DEVICE= line

    IP=192.168.11.111::192.168.11.254:255.255.255.0::eth0:off

    in this format [host ip]::[gateway ip]:[netmask]:[hostname]:[device]:[autoconf]. Notice that my example omitted, the [hostname]. Note that “IP=” is capitalized. I wasted more than 2 hours trying to figure out why the static IP is not properly configured.

  6. The initramfs static IP configuration will cause the Ubuntu server to freeze for some time during the boot process. To overcome this problem, down the network adapter after the initramfs. Edit the /usr/share/initramfs-tools/scripts/init-bottom/dropbear
    sudo vi /usr/share/initramfs-tools/scripts/init-bottom/dropbear
    

    append ifconfig eth0 0.0.0.0 down to the bottom of this file.

  7. Update the initramfs
    sudo update-initramfs -u
    
  8. Now disable the dropbear service on boot by removing from run levels

    sudo update-rc.d -f dropbear remove
    
    [sudo] password for parkia: 
     Removing any system startup links for /etc/init.d/dropbear ...
       /etc/rc0.d/K20dropbear
       /etc/rc1.d/K20dropbear
       /etc/rc2.d/S20dropbear
       /etc/rc3.d/S20dropbear
       /etc/rc4.d/S20dropbear
       /etc/rc5.d/S20dropbear
       /etc/rc6.d/K20dropbear
    

    This allows the pre-installed OpenSSH daemon to start up correctly.

  9. Done!

After a reboot you should be able to

ssh root@parkia

and with

unlock

you should see the following shell

#> ssh root@parkia
To unlock root-partition run unlock

BusyBox v1.21.1 (Ubuntu 1:1.21.0-1ubuntu1) built-in shell (ash)
Enter 'help' for a list of built-in commands.

# unlock
Unlocking the disk /dev/disk/by-uuid/43929d70-76a3-4695-976c-1a38b9490e3c (vg0-lvcrypt_crypt)
Enter passphrase:     Reading all physical volumes.  This may take a while...
  Found volume group "vg0" using metadata type lvm2
  3 logical volume(s) in volume group "vg0" now active
cryptsetup: vg0-lvcrypt_crypt set up successfully

The LVM name and message maybe different depends on how your setup your LVM and crypted block.

Troubleshoot

    • If Step 6 is omitted, the server will freeze for few minutes during boot up with the following messages
       * Starting configure virtual network devices             [OK]
      Waiting for network configuration...
      Waiting up to 60 more seconds for network configuration...
      
    • If Step 8 is not executed, your ubuntu server will use dropbear as the ssh server, and you will see the following error in your /var/log/auth.log file

      Oct 14 16:42:25 ubuntu sshd[954]: error: Bind to port 22 on 0.0.0.0 failed: Address already in use.
      Oct 14 16:42:25 ubuntu sshd[954]: error: Bind to port 22 on :: failed: Address already in use.
      Oct 14 16:42:25 ubuntu sshd[954]: fatal: Cannot bind any address.
      
    • There is still 1 minor issue (hopefully) which I am not able to resolve. This occur when the server is remotely unlock. At the end of the boot up process, the following error message is output to the server console:
      Error: unexpectedly disconnected from boot status daemon

      This error doesn’t seem to happen if LUKS passphrase is directly entered at the server console.

References