Short note for self reference on how to use the AppCompat v21 Toolbar for Pre-Lollipop android application with the following starting point:
- create a new Android Project from the Android Studio (1.0 RC 4)
- choose Blank Activity
Let’s start
- Disable the default ActionBarEdit
app/src/main/res/values/styles.xmlby adding the following lines (highlighted)<resources> <!-- Base application theme. --> <style name="AppTheme" parent="Theme.AppCompat.Light"> <!-- to remove the default action --> <item name="android:windowNoTitle">true</item> <item name="windowActionBar">false</item> <!-- For 2.x version --> </style> </resources> - Add
app/src/main/res/layout/appbar.xmlfile<?xml version="1.0" encoding="utf-8"?> <android.support.v7.widget.Toolbar xmlns:android="http://schemas.android.com/apk/res/android" android:layout_width="match_parent" android:layout_height="wrap_content" android:background="?attr/colorPrimary"> </android.support.v7.widget.Toolbar> - Remember to remove the hightlighted lines in the
app/src/main/res/layout/activity_main.xml<RelativeLayout xmlns:android="http://schemas.android.com/apk/res/android" xmlns:tools="http://schemas.android.com/tools" android:layout_width="match_parent" android:layout_height="match_parent" android:paddingBottom="@dimen/activity_vertical_margin" android:paddingLeft="@dimen/activity_horizontal_margin" android:paddingRight="@dimen/activity_horizontal_margin" android:paddingTop="@dimen/activity_vertical_margin" tools:context=".MainActivity">or else your will see the padding like this

- Now includes the
appbar.xmlinto layout fileapp/src/main/res/layout/activity_main.xml<RelativeLayout xmlns:android="http://schemas.android.com/apk/res/android" xmlns:tools="http://schemas.android.com/tools" android:layout_width="match_parent" android:layout_height="match_parent" tools:context=".MainActivity"> <include android:id="@+id/app_bar" layout="@layout/appbar"/> <TextView android:layout_below="@id/app_bar" android:layout_width="wrap_content" android:layout_height="wrap_content" android:text="@string/hello_world" /> </RelativeLayout> - Set the newly added toolbar to act as your ActionBar by adding the highlighted lines into
MainActivityclasspublic class MainActivity extends ActionBarActivity { @Override protected void onCreate(Bundle savedInstanceState) { super.onCreate(savedInstanceState); setContentView(R.layout.activity_main); Toolbar toolbar = (Toolbar) findViewById(R.id.app_bar); setSupportActionBar(toolbar); }

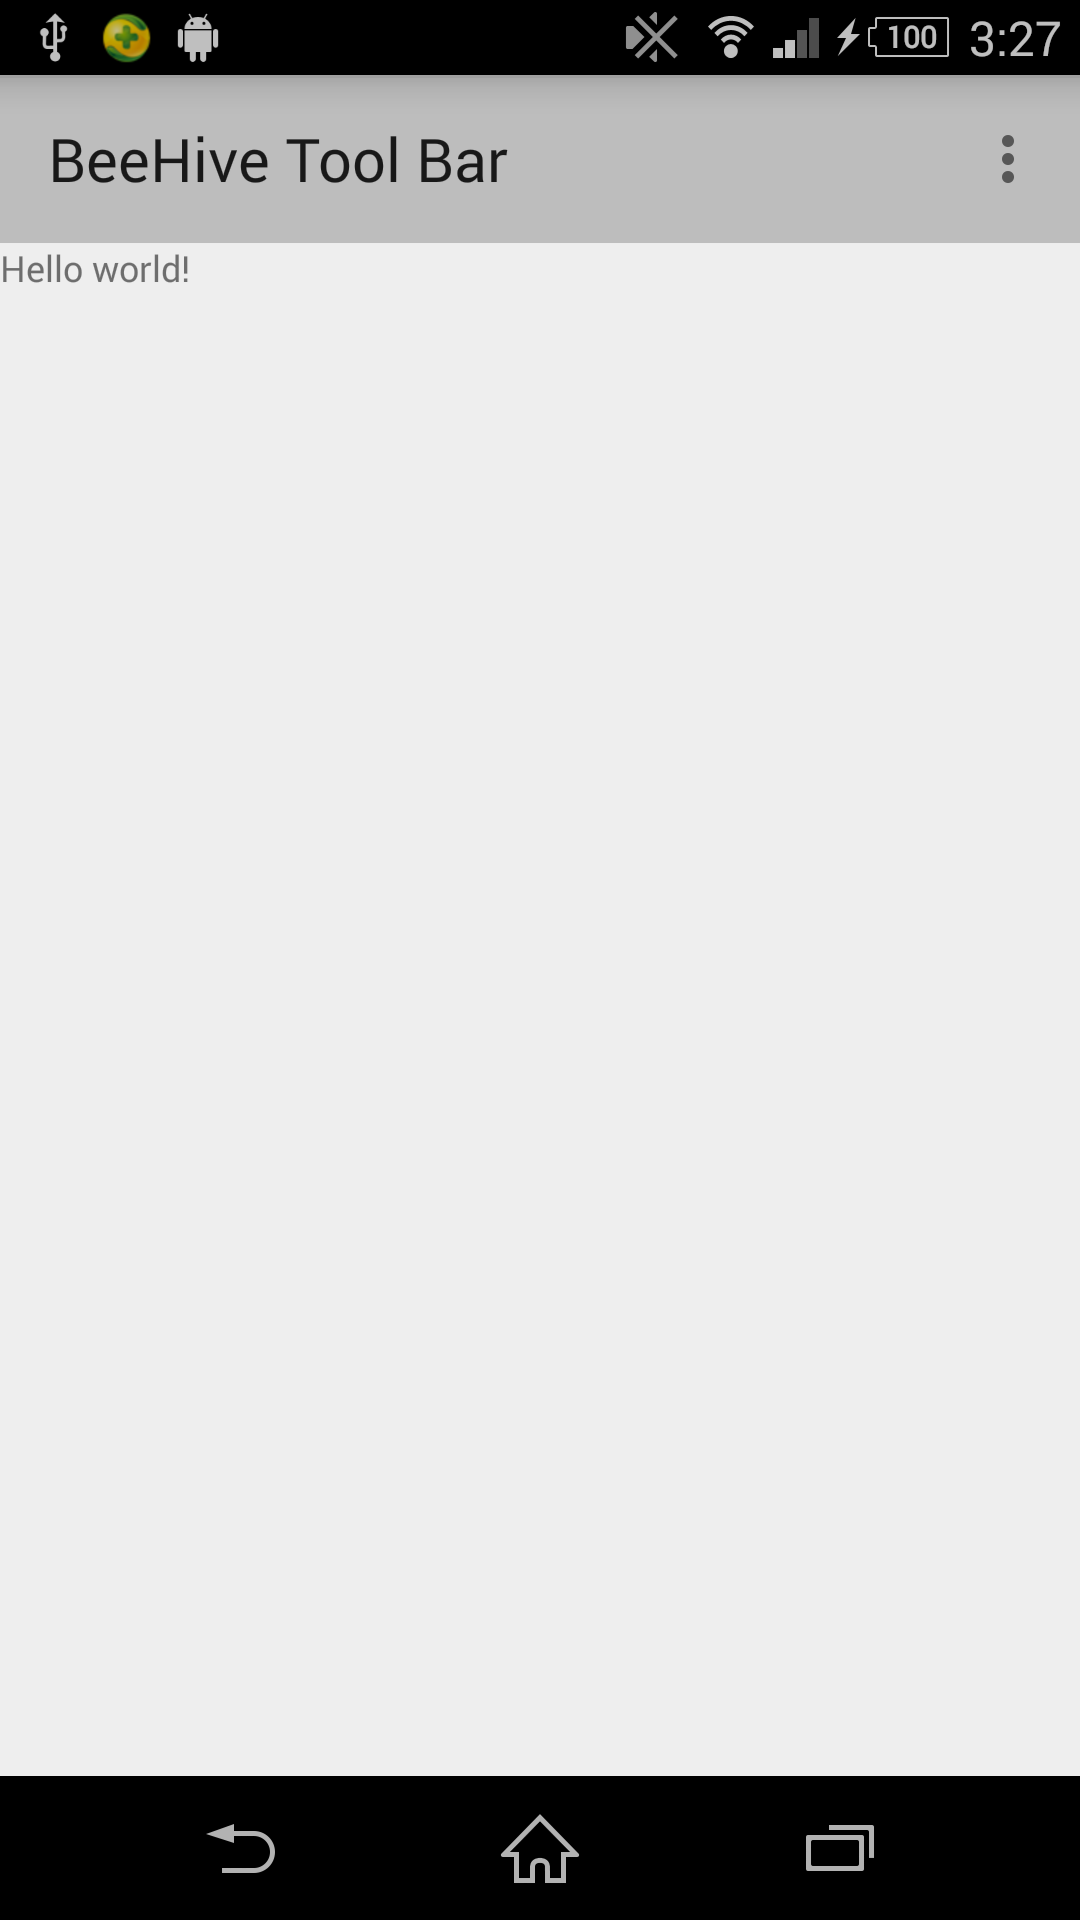
The final result…


I just noticed the font in the toolbar title in landscape mode look smaller than the potrait mode. In fact, I did a check by running Google Play and this seems to be the default styling for google.
References
Updated on 20th Feb 2015:
– fixed the missing highlight in Step 4 according to comment by Polmabri

Hey,
thanks for the good tutorial – only a tiny addition:
At step 4 you missed to mark the change “android:layout_below=”@id/app_bar”” at line 12
LikeLike
Thanks Brieger! I have fixed the highlight in Step 4.
LikeLike